

 DIRECT TOP-UP

 CARD
CARDArena Breakout: Infinite S7 Biohazard Mode Full Guide! Breakdown of the Three Modes: Infected Zone + Endless + No Man's Land

S7 Season “Utopia” launched on the 16th, and after playing Biochemical Mode for a week, I honestly have mixed feelings.
It is genuinely thrilling. The pressure of fighting mutants at point-blank range in the Infection Zone is completely different from hiding in a corner and holding an angle as you wait for players. But it can also be brutal. On my first day, the Reaper killed me with ranged acid spit three games in a row, and after respawning I ran straight into an Inflator’s suicide explosion······ Seriously, how did this game suddenly turn into a horror game??
After experimenting for a few days, I have mostly figured out the mechanics and stepped on nearly every trap there is. This guide breaks down all three S7 Biochemical modes, mutant counters, exclusive item usage, and how to claim the free rewards. If you have not started playing Biochemical Mode yet, or got overwhelmed after your first few runs, this should help you avoid a lot of unnecessary detours~
Choosing a Biochemical Mode — The Three Modes Have Completely Different Roles
S7’s Biochemical Mode has three variants, but their positioning and gameplay logic are very different. They are not simply different difficulty levels.
The Infection Zone is a PvPvE mode that replaces the Reinforced Lockdown Zones on Farm and Armory, as well as the Lockdown Zone on Valley. Once inside, you face two groups of enemies: mutants and other operator squads. At its core, this is still a loot-and-extract mode, but the battlefield is now filled with zombies that actively attack you. Dynamic weather also causes trouble, including reduced lighting, heavy rain, and dense fog that severely limit visibility. Valley uses the standard Infection Zone difficulty, while Farm and Armory are High-Intensity Infection Zones.
Biochemical Endless is a pure PvE mode available on the Armory map. You bring in nothing, do not need to equip any gear, and simply choose a class before jumping in. It uses roguelike mechanics, with each wave becoming stronger. Find merchants during the run to purchase upgrades, collect Merits, and compete on the leaderboard. You lose nothing when you die, making this mode ideal for players who want to relax and enjoy mowing down zombies.
Biochemical No Man’s Land is a time-limited PvE looting mode. You will not encounter other player squads or large-scale emergency missions. Just search for supplies and extract safely. This mode is tied to the Battle Pass event and is a zero-risk way to earn Koen. An entry ticket is required, but tickets are given out simply for logging in, and the developers say the free tickets are more than enough to play.
My recommendation: start with No Man’s Land if you want to practice, play Endless if you just want some action, and head to the Infection Zone if you want the full loot-shoot-extract experience and Biochemical mind games.
How to Fight the Six Mutants — Do Not Stand There and Trade Hits
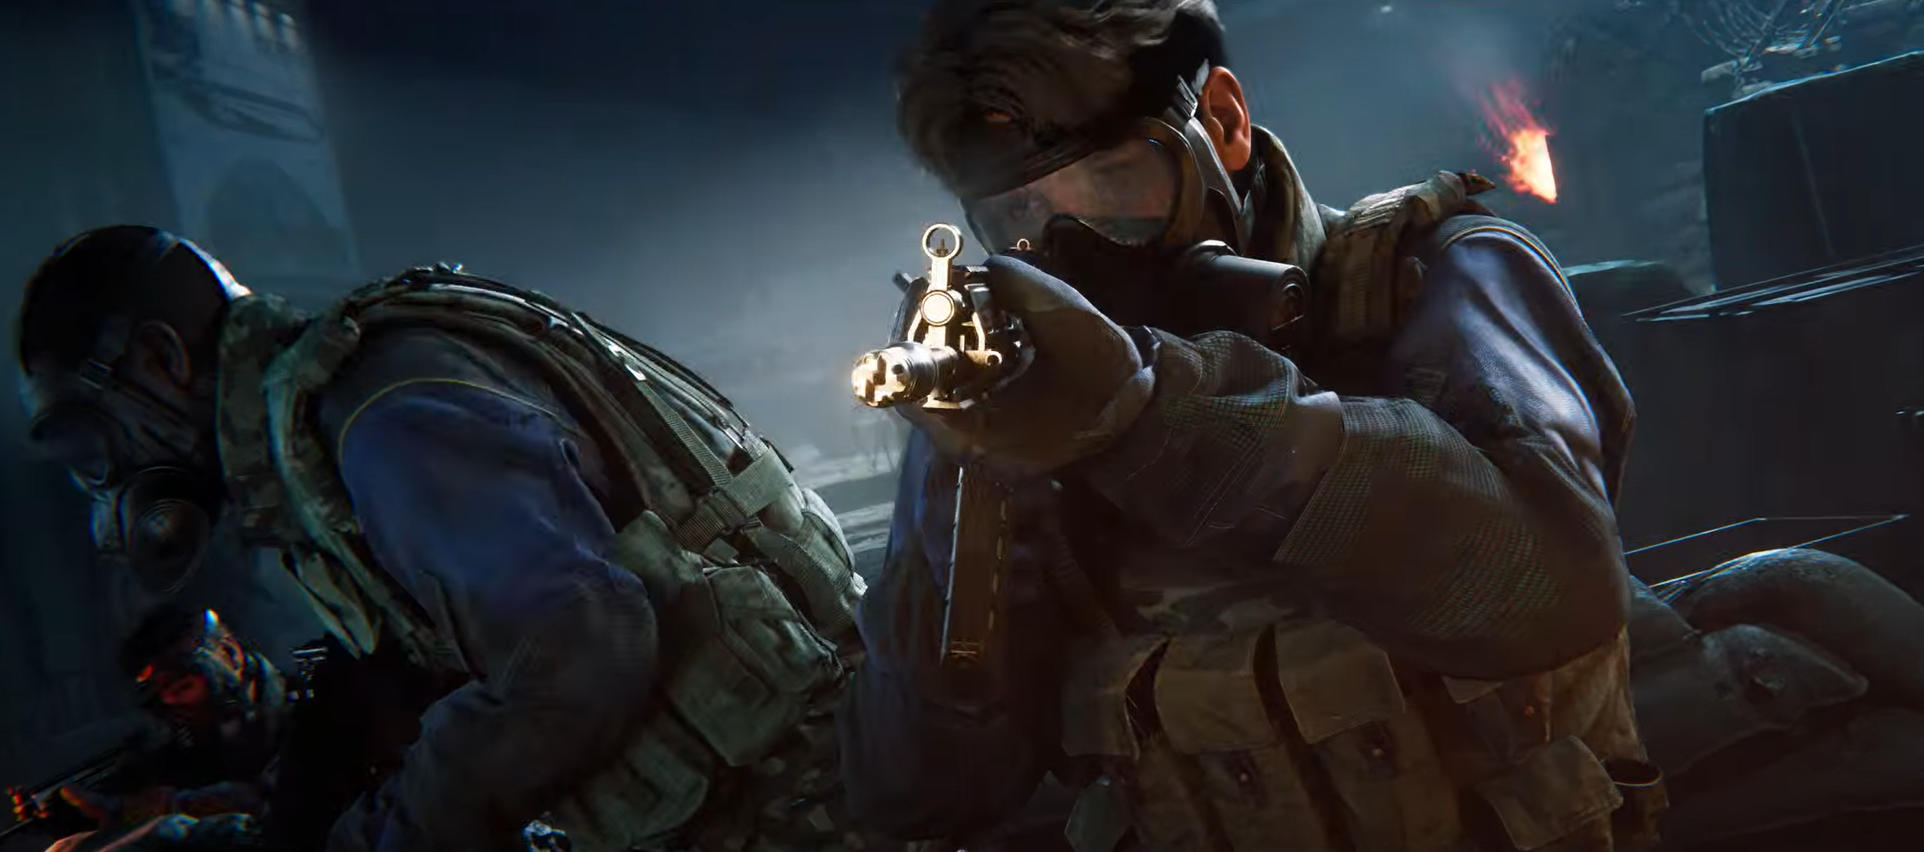
There are currently six types of mutants in the Infection Zone, and each has different behavior and threat levels. Most players who got destroyed on their first day did so because they tried to fight zombies using the same mindset they use against players.
The Reaper is a ranged mutant that spits acid at you and fires from high ground or a distance. Even worse, its slime remains on the ground and creates acid pools, marshes, or clouds, leaving you very little room to maneuver. The counter is simple: focus it down first and do not let it keep dealing damage. It is not particularly tough, but if you ignore it, your health will slowly be chipped away.
The Ambusher specializes in pouncing and can suddenly leap at you, pinning you to the ground. It is not scary in a one-on-one fight; the real danger is getting pinned while other mutants or an enemy squad are nearby. Dodge as soon as you hear it jump. The dodge window is fairly forgiving, so you can master it with a little practice.
The Inflator is a suicide mutant that applies a random abnormal status when it explodes, including poison, slow, or blindness. Never kill it while standing next to it. Keep your distance and shoot it down, or run before it gets close. If you are hit by the explosion and then encounter other mutants, you are probably done for.
The Breacher is a charging mutant with high speed that chases you with a hammer. Trading hits head-on is not worth it. Use the terrain to kite it, lure it into a narrow passage, or leave it for your teammates to handle.
Regular mutants are basic mobs. They come in large numbers but pose little threat, as long as you do not let yourself get surrounded.
How to Use Exclusive Items — The Pheromone Grenade Is a Game Changer
S7’s Biochemical Mode adds a number of exclusive items. Used well, they can save your life; used poorly, they are just wasted inventory slots.
The Type II Lure Pheromone Grenade is the most useful one. Throw it to draw mutants to a designated location. It has many applications: throw one in the opposite direction when you need to escape and the horde will be pulled away; throw one toward another operator squad and let the zombies do the fighting for you; or throw one into the distance when you want to loot safely and clear out a secure area. Its tactical value is much higher than that of damage-focused items.
The Healing Smoke Grenade continuously restores health within its smoke cloud, making it useful for reviving teammates or holding a position. Healing options are already limited in the Infection Zone, so this item can save a lot of medical supplies.
The Signal Gun calls in an airdrop and provides additional supplies. There are three stimulants that temporarily increase chest armor health, movement speed, or resistance to severe injuries. However, their drawbacks include increased damage taken from mutants and a higher chance of being detected. High risk, high reward, so use them according to the situation.
Remember to open the loot chests awarded by Extermination Missions. Every squad member can open one, and they have a chance to contain red-quality collectibles as well as a guaranteed high-value item.
The boss Phobos currently appears only in certain missions. It applies the greatest frontal pressure and cannot be handled easily in a one-on-one fight. Your squad needs to coordinate and kite it while managing firepower. Run when necessary instead of trying to prove yourself.
There is one more mechanic to watch out for: excessive gunfire can trigger a mutant horde event. If you keep shooting continuously to clear enemies in the Infection Zone, you may attract a large-scale zombie swarm. After clearing one wave, relocate immediately. Do not sort your inventory in the open or stand still to heal.
How to Claim Free Rewards — Do Not Forget the Battle Pass and Supply Crates
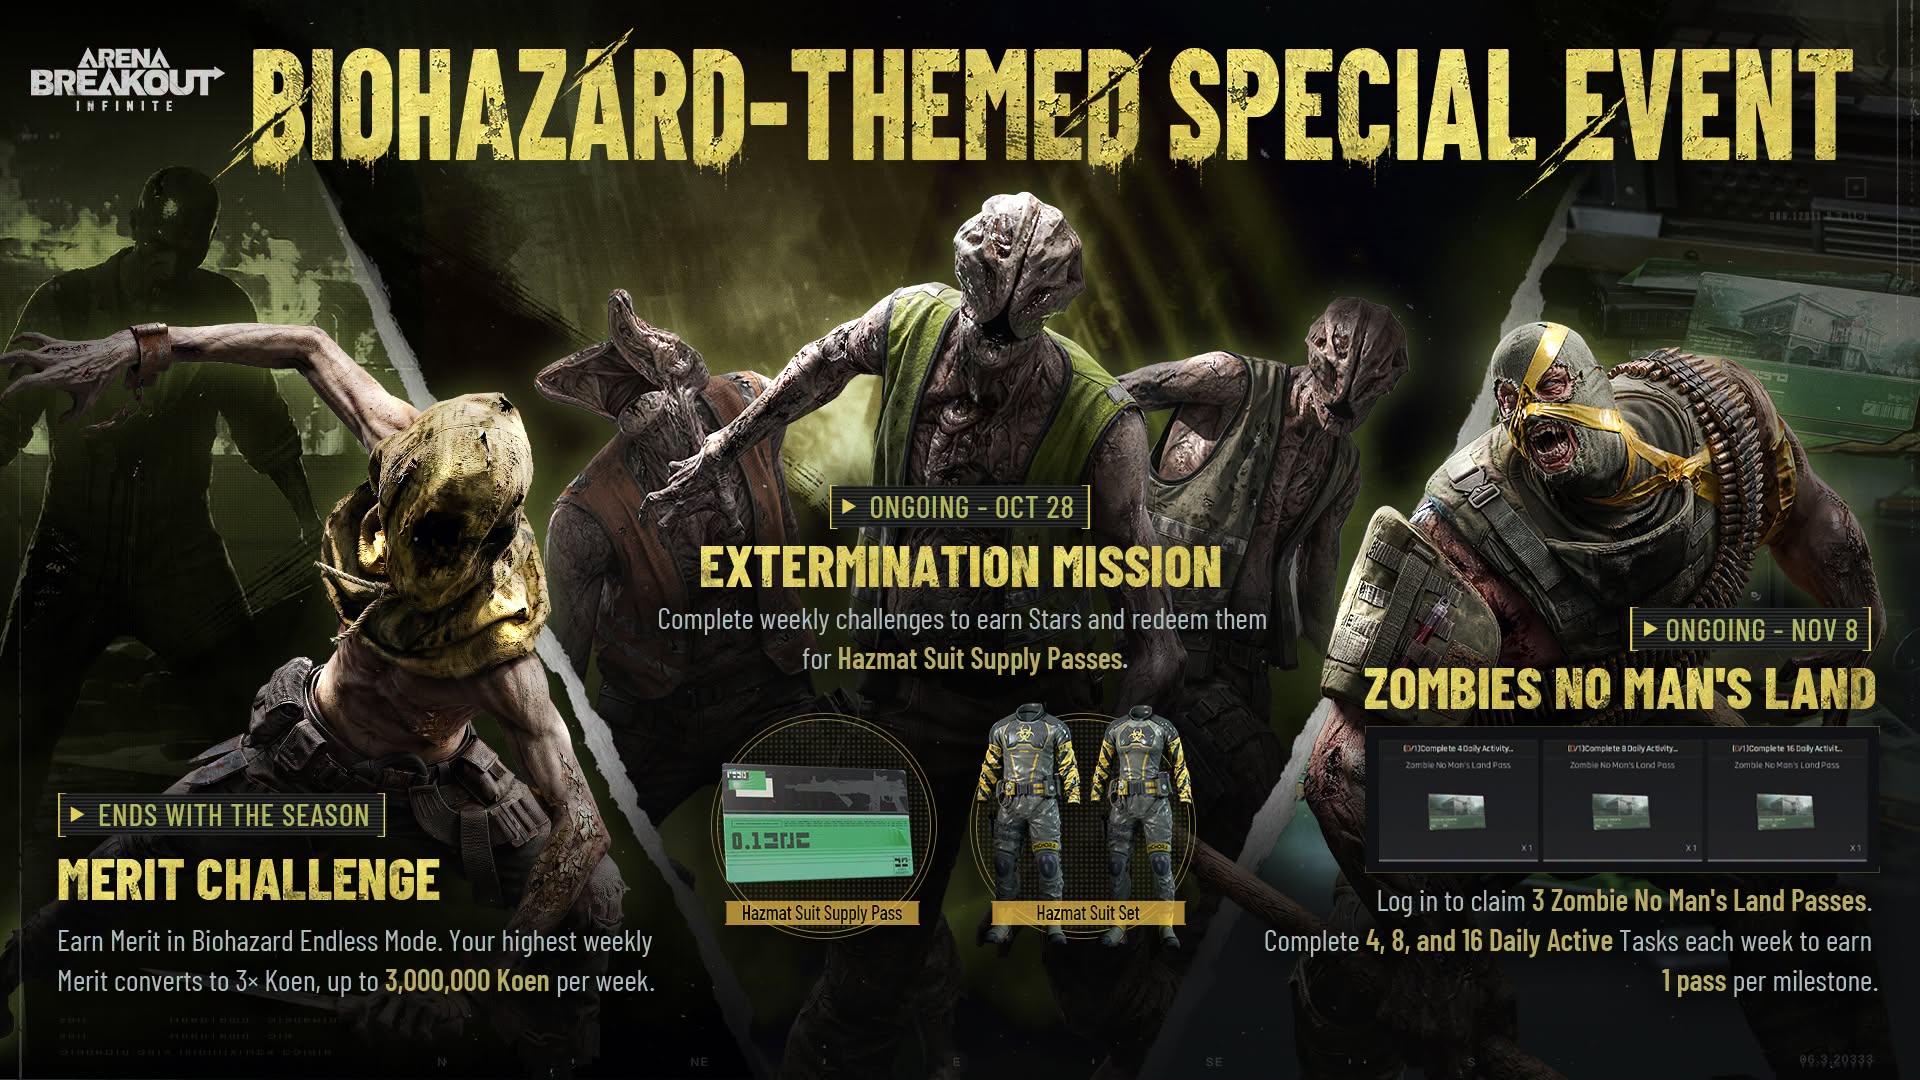
The free rewards this season are actually quite generous, but some are time-limited, so do not wait until the last minute.
Logging in grants 3 Biochemical No Man’s Land Passes + 50,000 Koen. The passes are entry tickets for No Man’s Land. The developers say the free supply is enough to play, but if you plan to use No Man’s Land as your main source of income, you should spend them carefully or replenish them through regular operation drops.
The full “Biochemical Squad” Supply Crate set, worth 3,400 Bonds, can be claimed for free by completing the launch event missions. No purchase is required; just complete the tasks.
The Evolving Engineer Shovel is awarded after 7 days of check-ins, with new forms unlocked after 14 and 21 days. It is a biochemical-themed cosmetic with more collection value than practical value, but free is free.
Do not forget the Merit Challenge. Earn Merits in Endless Mode, and your highest Merit total from a single match each week is converted into Koen at a 3x rate, with a weekly cap of 3 million. The rewards are sent by mail at 5 a.m. every Monday. This is the most reliable zero-cost way to earn Koen, so you can complete it naturally while playing Endless.
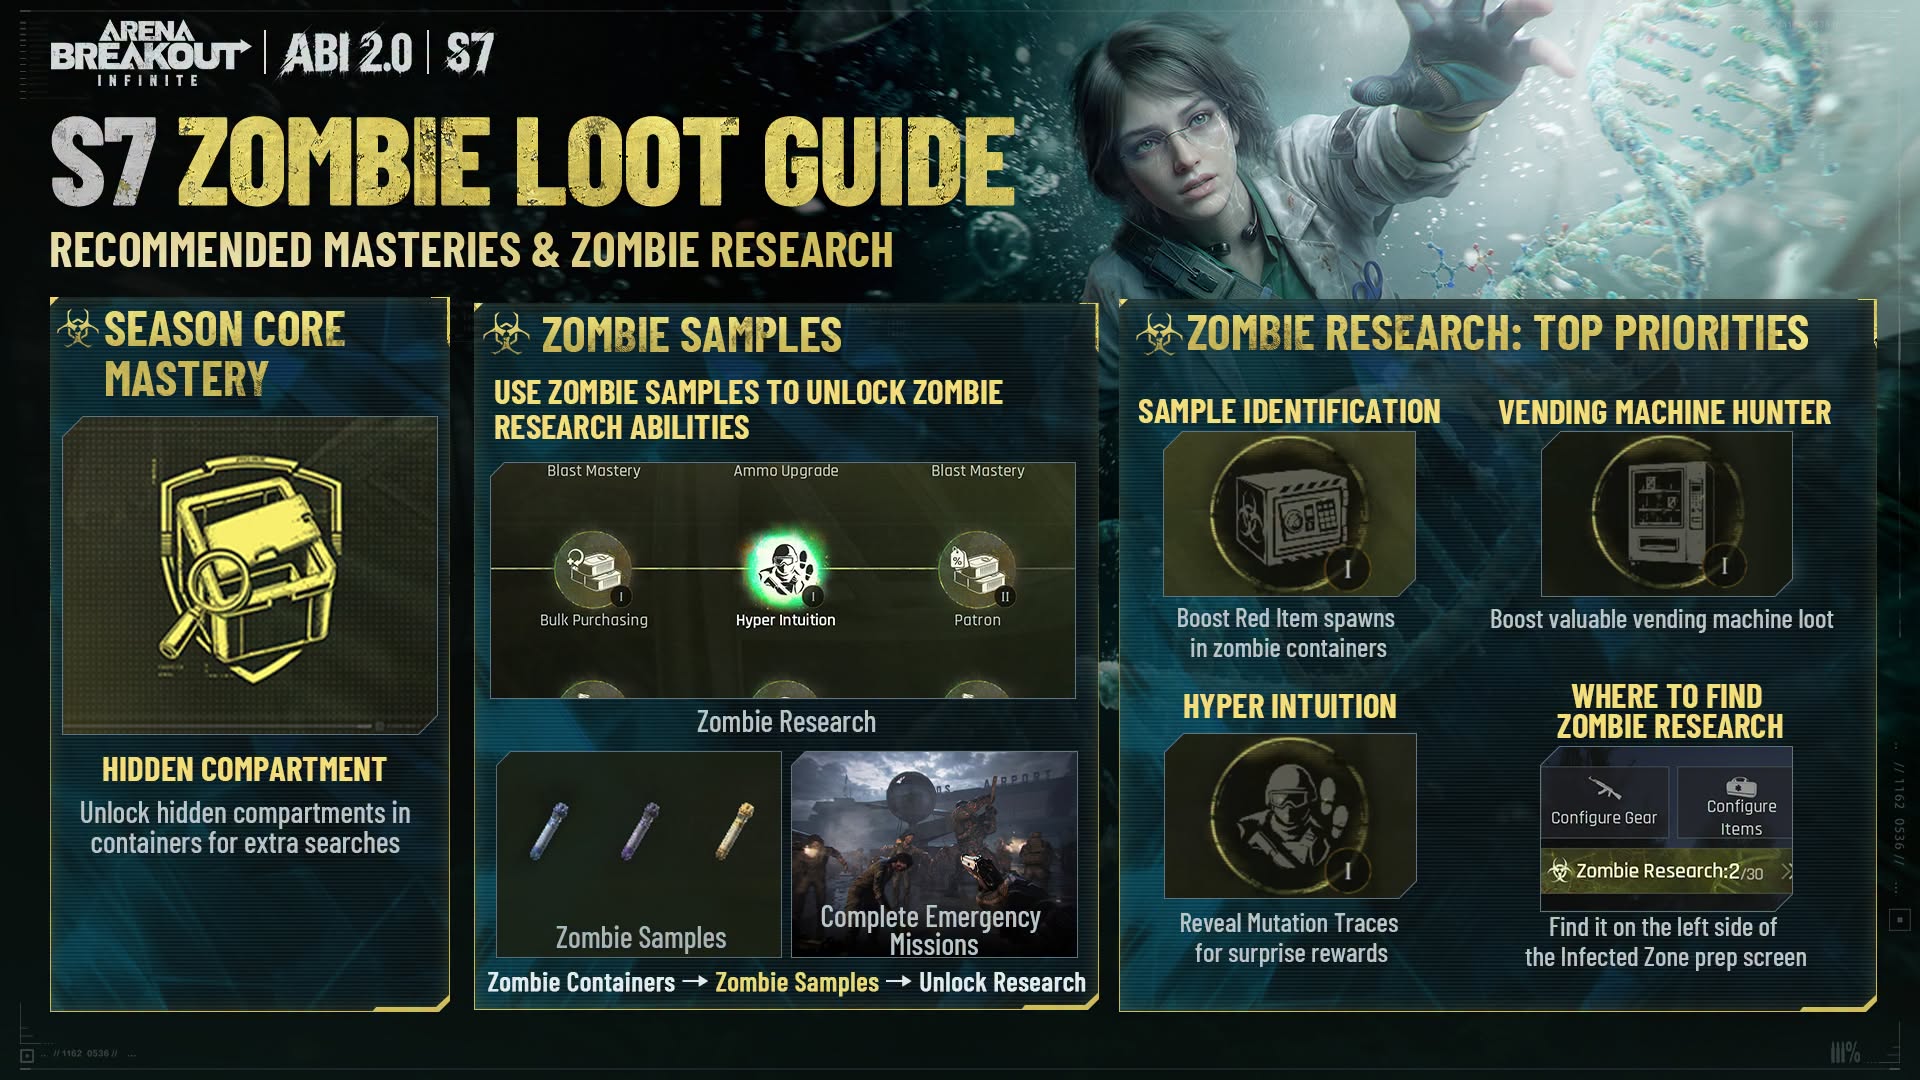
Biochemical Research is the out-of-match progression system for the Infection Zone. Collect biochemical samples during runs and bring them out to activate and upgrade research nodes. The unlocked abilities continue to apply in Infection Zone matches. If you plan to play the Infection Zone long term, this is something you will need to grind gradually.
KARDZ Recommended Top-Up Guide
We would like to share a few words with all operators.
S7’s free rewards are genuinely generous: a 3,400-Bond Supply Crate set, an Engineer Shovel, passes, and millions of Koen mean even free-to-play players can enjoy the season comfortably. However, if you want to unlock the premium version of the Season Pass or try your luck in the new Supply Crate pool, you will still need Bonds. The premium Season Pass returns an equal 300 Bonds at Level 1, and the new Supply Crate lets you claim a free first draw at Level 10, making the overall value fairly good.
When choosing a top-up channel, safety should always come first.
Third-party top-up services on the market vary widely. Low-price traps, black-card bans, and stolen accounts are problems that many Dark Zone players have probably heard about~
Kardz provides direct top-ups through your game UID, so you do not need to give your account password to any third party, eliminating the risk of account theft at the source. We offer 24/7 customer support and accept major payment methods including Visa, Apple Pay, and Google Pay. No matter your time zone, you can complete your top-up quickly!
For players who want to unlock the Battle Pass or add some Bonds during S7, Kardz is a safe, convenient, and reliable choice. Search for “Kardz” to learn more about the service. The official website provides detailed top-up instructions and frequently asked questions.
Honestly, this S7 biochemical season feels completely different from the way Dark Zone used to play.
Before, entering a map meant moving carefully, listening for footsteps, holding angles, and calculating profits. Now, entering the Infection Zone means listening for zombie howls, watching the weather, and always being ready to run or fight at point-blank range. The experiences are different, but both are addictive. Endless Mode in particular is pure PvE with zero pressure. Playing a couple of rounds after work to unwind feels much better than suffering through ranked matches~
Of course, being caught between mutants and operator squads in the Infection Zone is not pleasant. After dying several times on the first day, I even wondered, “Who is actually winning in this mode?” Things only got better after I learned how to use Pheromone Grenades properly and judge the situation by watching the weather and listening to sounds.
How are you finding S7 Biochemical Mode? Which mutant has given you the most trouble, or have you already started pushing the Endless leaderboard? Tell us in the comments. I want to see whether anyone else has had their mental state destroyed by the Reaper’s acid······

-671c575fe3054e079ea5d0d103a9c847.png?x-oss-process=image/resize,m_fill,h_72,w_72/format,webp)
-92028caca42f414dbd8681863f296b9c.png?x-oss-process=image/resize,m_fill,h_160,w_120/format,webp)
.3889d0fc-74ac50710b044340bd44dab8a52423fc-3586d75109ce407d9e379eb27e699030.png?x-oss-process=image/resize,m_fill,h_160,w_120/format,webp)






-3ba822ffbd424a338c9584a4ff4e71ab.png?x-oss-process=image/resize,m_fill,h_160,w_120/format,webp)